

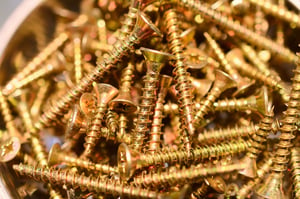
Marlin’s clients often want to know more about the various finishes that the manufacturing team uses for custom steel wire baskets. One of the most frequently-used finishes that Marlin Steel applies to its custom baskets is a passivated finish. Passivated finishes are often specified for stainless steel baskets because the process can enhance the chemical resistance properties of the stainless steel.
But, how does stainless steel passivation work, and what makes it different from other finishes, like electropolishing?
How Does the Passivation Process for Stainless Steel Work?
Some of the specifics of stainless steel passivation, such as the exact mix of chemicals used, may vary depending on the steel alloy used—what helps one alloy might damage another, so the process requires frequent customization. However, the basic process tends to have the same broad steps:
- Load the part or parts to be passivated into another container (usually a wire mesh basket that is purpose-built for the operation).
- Submerge the container and its contents into the chemical bath (typically a citric or nitric acid bath).
- Let the parts sit in the bath for an amount of time and at a temperature specified for that alloy.
- Remove parts from the bath and dry them off to remove excess chemicals.
As the stainless steel parts sit in the acid bath, the acid will begin to strip free iron and other contaminants from the surface of the part. Depending on the alloy being cleaned and the specific chemical bath used, this can enhance the protective oxide layer of a stainless steel part, making it more resistant to chemical attack in some situations.
While the passivation process can significantly alter the rust resistance of a part, it doesn’t significantly alter the appearance of the finished part. This is one of the major differences between passivation and electropolishing. Parts that have been electropolished can be readily identified by their smooth, shiny surface.
There are two primary types of passivation: Nitric acid passivation and pickling
What is Nitric Acid Passivation?
Nitric acid-based passivation is one of the most basic passivation techniques out there. Here, the stainless steel wire or sheet metal is dipped in a bath of oxidizing nitric acid. This mild acid bath removes some free iron molecules and other foreign matter from the surface of the steel while encouraging the development of the passive oxide layer.
However, this process does not remove heat tint, weld burns, or oxide scale from the surface of the steel.
What is Pickling?
Pickling is very similar to the basic passivation process in that a bath of acidic chemicals is used to strip the surface of the steel. However, where the basic passivation process uses mild nitric acid, pickling uses a more intensive chemical mixture, such as hydrofluoric acid.
This stronger acid strips the surface layer of the steel, removing impurities, weld burns, and free iron molecules—leaving an even, satin-like finish.
What Should You Know about Passivation Processes Like Nitric Acid and Pickling?
 These two processes cost about the same to carry out, and can help remove impurities and improve the strength of stainless steel’s passive oxide layer.
On a side note, it’s important to know the exact alloy of stainless steel being processed prior to picking your passivating process. This is because using the wrong solution on your stainless steel could cause damage to the steel rather than enhancing it.
For example, compare 304 vs 430 stainless steel for passivation processes. Each of these allows have different levels of resistance to nitric acid and other corrosives, which means that one might need a stronger nitric acid bath than the other to ensure proper passivation in the stainless steel. To note, austenitic stainless steels (like grade 304 stainless steel), tend to have higher chromium content than martensitic stainless steels (like grade 430 stainless steel), making the austenitic alloy more resistant to corrosion and pitting.
What Are Some of the Limitations of Passivation?
There are a few things that should be considered before passivating stainless steel parts, including:
- Welded Parts May not Be Suitable for Passivation. The passivation process isn’t as effective at stripping contaminants from weld zones as some processes.
- There’s a Need to Customize the Chemical Bath. The temperature and type of acid used in the passivation process’ chemical bath have to be adjusted for the specific steel alloy being passivated. This adds cost and complexity to the process compared to electropolishing.
- Some Alloys Cannot Be Passivated. Some stainless steel alloys that have low chromium and nickel content can actually be damaged by the acid bath. As such, they cannot be passivated.
- The Finish Will Look Mostly the Same. Unlike electropolishing, which strips away the surface layer of the part to leave a smooth, shiny finish, passivation doesn’t alter the appearance of the part much. So, if the goal is to create a smooth, nonstick surface, then the passivation process will not be ideal.
The primary advantages of the passivation of stainless steel are that it can enhance the rust resistance of a stainless steel part and that it is less expensive to set up than electropolishing. However, it’s important to balance these advantages against the advantages of using electropolishing or specialized coatings to finish a part.
Electropolishing Stainless Steel
Like the passivation processes listed above, electropolishing involves the use of a chemical bath. However, unlike the two processes above, electropolishing uses an electrolyte bath and an electrical current to dissolve the surface layer of the metal—leaving a microscopically smooth, shiny surface.
The smoothness of the new surface makes it almost perfectly non-stick because the electropolishing process removes nearly all of the microscopic flaws that debris would normally stick to. This has the added benefit of making the electropolished part easier to clean and sanitize.
Benefits of Electropolishing Stainless Steel
- Deburring Parts. By actively stripping the surface layer of a part, electropolishing removes many of the burrs and sharps that other finishing processes may have missed.
- Decreased Part Fatigue. Electropolishing eliminates surface fissures and minimizes the fatigue splits that occur on a microscopic level during the manufacturing process. This helps reduce part fatigue and create a stronger, longer-lasting part.
- Reduced Galling/Seizing. Because of the microscopic smoothness provided by electropolishing, this process is often used by manufacturers on threads of material to prevent galling and seizing in delicate mechanisms.
- Uniform Appearance. Electropolishing removes many of the weld and burn marks from steel that milder passivation processes would leave behind. This provides an aesthetic improvement for some manufactured parts.
- Ease of Control. Electropolishing can be applied to a variety of stainless steel alloys without requiring much customization for the setup. This makes electropolishing a better option for manufacturing setups that process numerous kinds of stainless steel alloys—such as when the manufacturer often has to choose between 304 vs 430 stainless steel for different applications.
The biggest drawback of the electropolishing process is that it can cost a bit more up front over a standard passivation process. Also, electropolishing doesn’t significantly alter the protective oxide layer of steel the same way that passivation can.
However, electropolishing remains the preferred treatment option when the surface condition of the part is the primary concern—largely because it creates a superior surface compared to passivation. For example, both the food and pharmaceutical manufacturing industries tend to prefer electropolished stainless steel surfaces because the microscopically-smooth surface is incredibly easy to clean and sterilize compared to a standard 2B metal finish.
With the right finishing process, the performance of a custom wire basket or other metal form can be greatly enhanced.
Creating a Custom Wire Basket for Passivating Surgical Equipment
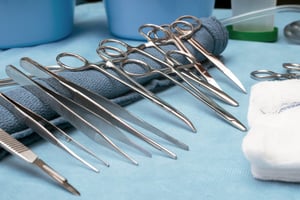 Passivation processes can be extremely rough on the baskets and trays that hold parts through them. When one medical supply manufacturing company ordered a custom wire basket for their passivation and ultrasonic parts cleaning process, Marlin Steel’s engineers used a proven process for ensuring that the basket’s design would be perfect for their needs:
Step 1: Collecting Information about the Client’s Passivation Process
The specific composition of the acids, and other elements of the passivation process, may change depending on the type of steel alloy being passivated. Because of this, whenever Marlin Steel is tasked with creating a custom wire basket or tray for passivating surgical equipment or other objects, Marlin always starts by asking for the specifics of the passivation process.
For this combination passivation/ultrasonic cleaning process, it was important to know:
- The Dimensions of the Passivation System. The size of the tank and openings for inserting/removing baskets are critical info for designing a custom passivation basket.
- The Specific Chemicals Used in the Process. Passivation is not a “one size fits all” kind of process. There are different chemicals that could be used depending on the metal being passivated. The harsher the chemicals, the tougher the basket needs to be.
- Part Dimensions and Load Weight. The dimensions of the parts will influence the size and shape of the basket. The bigger and heavier the parts, the larger and stronger the basket should be. Heavy-duty applications often call for thicker-gauge steel wires.
- The Duration of the Passivation Process. How long will the basket be submerged in the passivation fluid? The longer the baskets will be submerged, the more damage the passivation process can cause. Especially long processes require extraordinarily corrosion resistant alloys.
- The Severity of the Ultrasonic Waves Used in the Cleaning Process. How strong the ultrasound generator is directly influences how much strain the basket undergoes during ultrasonic cleaning. Higher ultrasound frequencies require stronger baskets—which usually means heavier-gauge wires and more thorough welds.
This information would prove vital for knowing what the best custom basket design would be for the client’s needs.
Step 2: Virtually Testing Basket Designs to Save Time and Eliminate Errors
Traditionally, making the perfect custom wire basket for ultrasonic cleaning and passivation would be a long, drawn-out process. Baskets would be made using “best guess” logic based on what worked for similar projects in the past. Then, the physical prototype would be shipped out to the customer and put through a series of stress tests over the course of a few weeks or months. If problems were found, the basket would have to be redesigned for the process to start over from the beginning.
There are a few problems with this method:
- Time to Delivery. Physical prototyping is painfully slow, and can push back manufacturing deadlines significantly.
- Cost of Prototypes. The metal for the baskets, shipping costs, and lost production time from the lack of a viable basket all have a cost—biting into operating budgets.
- Difficulty Identifying the Root Cause of a Basket Failure. With physical prototyping tests, it can sometimes be hard to be 100% sure of the reason why a basket fails. Did chemical corrosion compromise the basket’s tensile strength? Or, did the effects of ultrasonic vibration cause it? Knowing the cause of failure is a must for correcting such failures in the future.
To save time and resources on nailing down the perfect custom basket design, Marlin Steel uses a faster and more effective form of testing that uses physics simulation software to test a design virtually.
In mere minutes, Marlin’s engineering team can simulate years of use—without needing to waste a single cubic inch of steel on a prototype. Even better, if a part fails in the physics simulation, the cause of the failure is automatically logged and reported to the team. Because the engineer knows the cause of the failure, it’s easier to specifically counter the problem.
For example, if a basket fails because intense vibrations shake it apart at the weld joints, then those joints can be redesigned to be more resistant to vibrational stress. Or, if corrosion was the culprit, then the materials used for the basket could be changed to make it more resistant.
Step 3: Ensuring Consistent Quality with Factory Automation
A design can be technically perfect, but that won’t matter if the end product isn’t manufactured to a consistent standard. Creating a consistent part that can meet tight tolerances is one of the biggest challenges in any custom manufacturing application.
This is why Marlin Steel uses advanced manufacturing automation to build its custom steel wire baskets and trays for medical industry clients. These manufacturing robots can work day in and day out without tiring or getting distracted. This lets them consistently manufacture parts to meet millimeter-precise tolerances.
The consistency of manufacturing automation tools helps to minimize parts rejection rates—helping Marlin increase throughput while reducing costs from scrapped baskets.
Because of Marlin’s investments in physics simulation software and factory automation—in addition to gathering detailed information about the customer’s passivation process—making the perfect custom wire baskets for the client’s passivation and ultrasonic cleaning process was easy. This allowed Marlin to accomplish in a couple of weeks what would take months for a company without these tools.
Passivation Basket Longevity and Total Cost of Ownership
Passivation processes can be very tough on the baskets used in them. This can lead to a shorter useful life as the baskets are worn away by the chemicals used to strip the top layer of free iron molecules from your parts.
The amount of time that a basket can last in your passivation process can have a significant impact on your total cost of ownership.
For example, say you have a choice of two different baskets:
- Basket “A” is built to barely meet the minimum requirements of the job and has a useful life of 8 months on average. After that 8 months, the basket becomes too degraded to use safely with your passivation equipment.
- Basket “B” is built to far exceed the minimum requirements needed for your passivation process and has a useful life of 4+ years on average. However, basket B costs 2.5 times as much as basket A.
In this theoretical example, 10 units of basket A would cost $2,000, and 10 units of basket B would cost $5,000. In the short run, basket A might seem like the better purchase, but in the long run, basket A would actually end up costing far more than basket B.
Let’s say you use the same passivation process for the next 8 years. In that time, basket A will cost $24,000, because you’d have to buy the baskets 12 times at a cost of $2,000 each time. Over that same period of time, basket B would only have to purchased twice at a cost of $5,000, for a total of $10,000.
This makes the more expensive, but longer-lasting, basket much more affordable in the long run.
If you need a stainless steel basket for passivation keeping in mind the nature of your passivation process and the expected longevity of the baskets for passivation that you order are a must for managing costs.
Learn how Marlin Steel delivers quality, engineered quick for stainless steel passivation baskets and many other specialty applications by contacting a mechanical engineer.
.gif "View our in-stock products")

